

By IBP Paving. Published 9 October 2026.
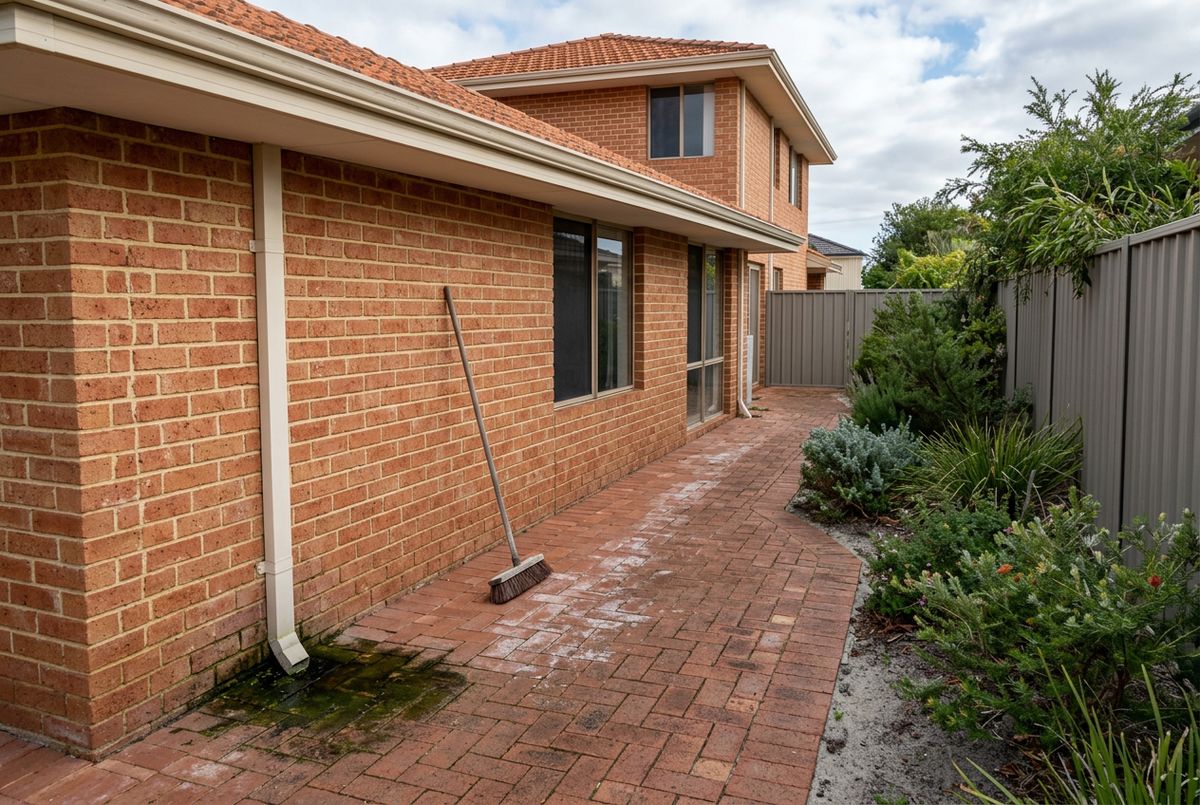
A seasonal checklist for Perth paving
Paving on a sand base is a living surface. The pavers themselves last decades, but the sand in the joints, the sand underneath and any sealer on top all need topping up, and Perth's climate sets the rhythm. The routine below is what we suggest to clients after we lay a new area, and it is the same routine that keeps a 30 year old driveway in Girrawheen looking like a 10 year old one. The full paving sealing and cleaning service handles the heavy jobs; this is the part you do between visits.
| Season | What to do |
|---|---|
| Autumn, March to May | Clean gutters and clear downpipe outlets so roof water does not run across the paving. Sweep, check the joints and top up sand before the rain. Look for low spots that will puddle. |
| Winter, June to August | Watch for ponding after storms and for green or black growth on shaded areas. Keep leaves off the surface, because wet leaf litter stains and feeds algae. Do not seal: the pavers never dry. |
| Spring, September to November | Treat moss and algae once the surface dries out. Dry brush efflorescence. Pull or treat weeds in the joints before they seed. Check for ant activity as the ground warms. |
| Summer, December to February | Pressure clean if needed, re-sand the joints, then seal or reseal in a dry spell, applying early morning or late afternoon rather than in midday heat. |
Efflorescence on clay and concrete pavers
The white bloom that appears on new paving in its first winter is efflorescence: water moving through the paver or the bedding sand dissolves salts, carries them to the surface and leaves them behind as a powder when it evaporates. It is common on new clay pavers and on concrete, it is not a defect, and on most jobs it weathers off within a few months. Brush it off dry first, because wet brushing just dissolves it back into the paver. If it keeps returning, household vinegar or a dedicated efflorescence remover will lift it from clay and concrete. Never put acid, vinegar or any efflorescence product on limestone or travertine, which are themselves calcium based and will etch.
The one rule that matters is sequence. Efflorescence has to finish before the paving is sealed, because a sealer applied over active salts traps them under the film and the white turns into a permanent cloud. Allow at least 4 to 8 weeks after laying, longer if the bloom is still returning after each wet week.
Moss and algae on south facing paving
Any paving that does not see winter sun grows things. The south side of a house, the strip under the eaves, the base of a boundary fence and the damp patch below a downpipe are where green algae and black mould show up first, and a paved area that holds water because of a poor fall will grow a full carpet. Green is algae living on the surface. Black is mould, or a bedding sand that never dries, and it is slippery either way.
Treat it once the weather dries out: an oxygen based outdoor cleaner, a stiff broom, and a rinse, repeated if it is thick. Chlorine and bleach work on clay and concrete but must stay away from limestone, travertine and any sealed stone. Then deal with why it grew. Fix the ponding, cut back the shrub that shades the strip, and redirect the downpipe that keeps the corner wet. A sealer makes the surface less porous and slows the regrowth, but it will not stop algae on paving that is wet for four months of the year.
Ants and jointing sand loss
On Perth's sandy soils ants are the number one cause of paving that sinks without a drainage problem. They nest in the loose bedding sand beneath the pavers and carry it up through the joints, grain by grain, leaving small sand cones on the surface and a slowly growing void underneath. The pavers above settle into the void and the area starts to dish and rock. Joint sand also simply washes out over time, especially in the first year and after every pressure wash, and open joints let in water, weeds and more ants.
The fix has three parts. Treat the nests with an ant product along the joints and around the edges. Refill the joints with a sand that sets, either a polymeric jointing sand that binds when wetted or a dry mix of sand and cement swept in and lightly misted. Then seal, because a sealer locks the top of the joint. Loose sand brushed in on its own will be gone by the next winter. Paving that has already dropped needs the void filled and the pavers relaid on fresh sand, which is a sunken paving repair rather than a maintenance job.
Weeds in the joints
Weeds do not grow up through paving from below. They seed into the joints from above, land in sand that holds moisture and get going before you notice. Pulling them is fine for a handful; a flame weeder or a weed knife along the joints is faster for a long path. Do not use salt, which damages the pavers, the bedding sand and anything planted nearby. The permanent fix is the same as for ants: bound jointing sand and a sealer over the top, so there is nothing loose for a seed to take root in. Where weeds keep appearing along one edge, check whether a garden bed is washing soil onto the paving every time the reticulation runs.
Pressure cleaning without wrecking the joints
A pressure washer is the fastest way to clean paving and the fastest way to damage it. Keep it under about 2,000 psi, fit a fan tip and hold it at an angle rather than pointing straight down into the joints, because a close jet strips the jointing sand out in seconds and can scar the surface of concrete and softer stone. Always re-sand after washing. Let the paving dry for at least 48 hours of dry weather before sealing, and in Perth summer that is easy to arrange. Keep the dirty water out of the stormwater system where you can, by letting it soak into lawn or garden rather than running it down the kerb. For limestone, travertine and sealed stone a hose, a broom and a suitable cleaner are usually a better choice than a pressure washer at all.
When to seal and how often
Not every paver needs sealing, and the wrong sealer causes more trouble than no sealer. Clay brick pavers do not fade, so sealing them is optional and mostly about stains, efflorescence and holding the joints. Concrete pavers are usually worth sealing to protect colour and surface. Natural stone and reconstituted limestone should be sealed, with a penetrating sealer that leaves the natural look and lets the stone breathe. Film forming or wet look sealers give the strongest stain resistance but can be slippery when wet and hold heat in the sun, which matters around a pool. Some porcelain and some engineered stone products are supplied with instructions not to seal, so check the supplier's advice for your product.
How often depends on wear. The usual intervals are 3 to 5 years for brick and concrete and 2 to 3 years for pool surrounds and stone, where salt, chlorine and bare feet wear the sealer faster. The test is simple: sprinkle water on the surface. If it beads, the sealer is working; if it soaks straight in, it is time. For cost, published Perth sources give cleaning at about $3 to $6 per square metre, sealing at about $5 to $10 per square metre on top of cleaning, or $5 to $15 per square metre for sealing alone, with a typical 30 to 50 square metre patio around $350 to $600 and a 50 to 80 square metre driveway around $550 to $950 for clean and seal. Those are indicative Perth industry ranges from public price guides, not IBP's prices; we quote after seeing the paving. The sealing and cleaning page explains the two visit process and the sealer types in more detail.
Maintenance or repair
Everything above keeps good paving good. It will not fix paving that has sunk, lifted on a tree root or spread because the edge was never restrained. If an area rocks underfoot, holds water in a dish, or has joints wide enough to lose a key in, it needs the pavers up and the base corrected, which is paving repair work and comes with our lifetime workmanship warranty. For anything that still looks sound but tired, a clean, re-sand and seal from IBP Paving will usually buy it another decade, and we service the whole of Perth's northern suburbs from Landsdale.